Showing posts with label makeup. Show all posts

Thursday, February 26, 2015

How to Clean Makeup Tools

How to Clean Makeup Tools


how to clean makeup brushes
Photo Credit: Makeup.com


Here is the last post in the series. 

Hope you all enjoyed, and learned when to toss or clean your makeup. 

 How to Clean a Makeup Sponge

  1. Wet. Run the sponge under warm water.
  2. Lather. Using a few drops of mild soap or gentle shampoo work any product out of the sponge with your fingers.
  3. Rinse. Rinse the sponge until the water runs clear.
  4. Dry. Wring it out and pat dry with a clean towel. Allow the sponge to air dry, or if you prefer to use it damp, go ahead and put it to work.
  5. Repeat. Makeup sponges should be cleaned after every few uses or once there is no longer a clean, unused section. Rinsing the sponge with warm water after each use will also help keep the germs away and your sponge in good condition.

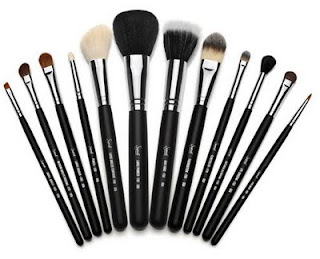
 How to: Clean Your Makeup Brushes

  1. Rinse. Rinse the bristles, always with water streaming down–you want to avoid running water directly into the base of the brush, which can weaken the glue and shorten the lifespan of your brush.
  2. Cleanse. Work a small amount of gentle shampoo (I prefer to use baby shampoo) into the bristles. Lather, rinse, and repeat until the water runs clear.
  3. Disinfect. Now that your brushes are clean, it’s time to disinfect. Mix a solution of 2 parts water and 1 part vinegar in a shallow bowl. Swoosh the brush around in the bowl for a minute or two (again, trying not to submerge it fully). Rinse with fresh water. I also like MAC cosmetics brush cleaner. I put it into a small spray bottle and spray onto bristles. 
  4. Dry. Reshape the bristles and lay clean brushes flat on a towel overnight to dry.
  5. Repeat. Clean your brushes every other week to keep the germs away from your makeup and off your skin.

 How to: Clean Your Hairbrush

  1. Prep. Remove as much hair from the bristles as you can. Using a comb or toothpick can help you grab what your fingers may miss.
  2. Soak. Fill a bowl with water and add a few drops of clarifying shampoo. If your brush is plastic, soak it for three to five minutes. If your brush has a fabric head, do not soak it, but dip the bristles in the water a few times.
  3. Scrub. To get those bristles good as new, take an unused toothbrush, wet it with the soapy water and give it a good scrub. Rinse with fresh water.
  4. Dry. Lay the brush bristle-side down on a towel to allow water to drain out of the base. Leave it to dry overnight.
  5. Repeat. Give your brush a bath once a month to prevent product buildup from comprising the quality of your lovely locks.

How to: Clean Your Metal Tools

  1. Wash. For metal tools like tweezers, eyelash curlers, eyebrow trimmers, cuticle nippers, and nail clippers, wash them down using water and antibacterial soap. Pat dry with a clean towel.
  2. Sanitize. Thoroughly wipe down the tool with an alcohol-soaked cotton ball. Allow it to dry for a few moments. If the tool comes in contact with your face, rinse it with water (no need to rinse your nail tools). Pat dry with a clean towel.
  3. Repeat. Ideally these types of beauty tools should at least be washed with soap and water after each use, if not sanitized as well. Aim to give them the full treatment every two weeks. Store your tools in a clean container to safeguard your hard work.


Monday, February 23, 2015

Makeup Tools: Clean or Toss


Makeup Tools: Clean or Toss


Photo Credit: Makeup.com


AS promised, here is the second of the series of posts. 

I get asked all the time when I know to clean a tool or toss it and purchase a new one. 

Well here are some tips on just that!


Makeup Brushes

Clean: The more often the better, but aim for every other week. 
Toss: When ratty or frayed.


Makeup Sponges

Clean: Weekly. Unless you’re using the average drugstore makeup sponge, those are for one-time use only. 
Toss: Every 3 months or when cracked.


Eyelash Curlers

Clean: Weekly with a cotton pad soaked in rubbing alcohol. 
Toss: Replace the rubber pad every 4-6 months or when torn. Replace the curler when it loses tension. For most, that’s about every 12-18 months.


Makeup Bags

Clean: Give it an honest assessment yearly. If it’s in good condition, throw it in the washing machine. 
Toss: When it’s no longer salvageable.


Tweezers, Sharpeners and Nail Tools

Clean: Ideally metal tools should be cleaned and disinfected after every use, or at least every 2 weeks. 
Toss: When the tools start to dull or you see rust or corrosion.


Razors

Clean: Thoroughly rinse your razor and allow it to dry outside of the shower after every use. 
Toss: Weekly or when it begins to dull.


Hairbrushes

Clean: Remove hair from the bristles weekly. Give it the full treatment monthly. 
Toss: When bristles are broken or damaged. 


Friday, February 20, 2015

Save or Toss?

Save or Toss?


In the next few weeks I am going to be doing a series of blog posts about how long to keep make up, when to toss or save, and how to clean it. 

Stay tuned to see all the great tips.

But for now here are some great tips on if you should save it or toss it!


Mascara
Mascara should be replaced every three months, since its liquid consistency makes it more vulnerable to bacteria, and its proximity to your eye can lead to possible infections. 

Liquid Liner 
Liquid eyeliners present the same concerns as mascara, so they should be replaced every six months. Pencil eyeliners, however, should last you up two years. Sharpen your pencil with each use to keep it fresh. 

Foundation 
For liquid foundations, say goodbye if you notice any change in smell, texture or color. Most foundations should last you up to a year, but if you’re prone to acne, think about tossing yours every six months. 

Lipgloss 
Because of the liquid consistency, lipgloss needs to be replaced more often than lipstick. Swap yours out every 12 months. 

Concealer 
As with liners, the longevity of concealers depends on consistency. Liquid concealer should be tossed after one year, but powder concealer is fine up to two years. 

Nail Polish 
If you notice a change in color or a funky smell, it’s time to part ways with your polish. In general, it should last you up to two years and some have expiration dates on the back of the bottle.  

Lipstick 
Consider it a long-term relationship- lipstick can last up to two years! Dispose if your lipstick becomes dry or changes hues. 

Powder, Blush, Bronzer, Eyeshadow With proper care, and clean brushes, powder-based products can last for a couple of years.

Tip: To keep track of your product expiration dates, write the date of purchase in sharpie on the bottom of each product so you’ll know when they pass their prime.

Sunday, November 16, 2014

Sigma Dupes for MAC brushes


Money Saving Tip

I have loved Sigma brushes for a long time now, and can honestly say that I prefer Sigma over MAC. 

Now don't get me wrong, MAC is a wonderful brand and I 100% support it, however if there is a  product that does the same thing but costs a fraction of the price, I AM ALL OVER IT. 

Here are a few of my favorite dupes that I have found over the years.

Eye Brushes:

Eye Liner Brush 


Pencil Brush

Sigma E30 vs MAC 219

Tapered Blending Brush


Sigma E40 vs MAC 224

                       Eye Shading Brush

Sigma E55 vs MAC 239
Large Shading Brush

Sigma E60 vs MAC 249
Small Angle Brush

Sigma E65 vs MAC 263

Medium Angled Shading Brush


 Sigma E70 vs MAC 275

Face Brushes:

Large Powder Brush


Sigma F30 vs MAC 150

Large Angled Face Brush


Sigma F40 vs MAC 168

Duo Fiber Brush

Sigma F50 vs MAC 187 
Foundation Brush

Sigma F60 vs MAC 190
Concealer Brush

Sigma F70 vs MAC 194
Complete Brush Kit $79

Sigma 12 Brushes Without Roll


Image credit: http://anitabonitat.blogspot.com/2011/07/grab-deal-sigma-brush-kits.html

Friday, April 26, 2013

Bronzing 101


I wanted to share a few tips on bronzing! The goal is to simplify it as much as I can but still help you see the impact. The three golden rules for bronzing are:
  1. Pick a bronzer that isn’t orangey oompa loompa.
  2. Always tap away excess on the counter and swirl the brush on the back of your hand first. Hear my voice in your head: you can’t ever go directly from the compact to your face! It has to go through the back of your hand first to grant access to your face. This ensures it will never get muddy.
  3. And apply it where the sun would hit your face if you were lounging on a chaise in Tulum!
Here’s how:
TOOLS:
  • Bronzing Powder — pick one that is shimmer free and is more brown than orange. I use Mac Bronzer in Bronze
  • Bronzing Brush — there are many styles that you can choose from but my favorites is Sigma Tapered Face Brush because it is angled to fit the face perfectly. 
STEPS:
  1. Tilt your head up and imagine where the sun’s rays would hit your features.
  2. Dip your brush in the compact, tap off any excess on the counter, swirl the brush on the back of your hand to smooth it out, then start by sweeping the brush across the top of your hairline.
  3. Next fill in your forehead and temples. Go back to reload, tap away excess, swirl a little on the back of your hand, then sweep across your cheekbones and down the bridge of your nose and tap a little on your chin.
  4. Go back to reload, tap away excess, swirl a little on the back of your hand, then lift your chin. No, the sun wouldn’t reach your neck, but that’s why you have to go back and make sure to fill it in as well. Otherwise your chest and face will be a different color than your neck!
Credit to thebeautydepartment.com

Saturday, February 5, 2011

The make-up and brushes I use


Hello ladies,

This is the second blog about the make-up products I use as promised

I will post in order the products I use on my face and eyes, as well as the bushes I use with that product if any. Hope you all enjoy!

So lets get started!

Face Routine

Laura Mercier - Oil Free Tinted Moisturizer


Laura Mercier - Silk Cream Foundation


Laura Mercier - Oil Free Foundation


Laura Mercier - Cream Eye Concealer


Benifit - Boi-ing Concealer / Eye Bright


Laura Mercier - Concealer Duo


Mac - Mineral Skin Finish Natural - Setting Powder

Bare minerals - Flat Top Kabuki Brush


Mac - Mineral Skin Finish Natural - in a darker shade for contour

Mac - 109 Brush for contour


Smashbox - Bronzer


Mac - Blush

Mac - 108 Angled Blush


Mac - Mineral Skin Finish Natural - Soft & Gentle - Highlight

Mac - 165 Small Tapered Brush


Mac - Paint Pot - Eye Shadow Base / Primer

I apply these with my fingers


Mac - Holiday Eye Shadow Sets


Mac - Eye Shadow Quad


Mac - Single Eye Shadows in Palette - Neutral


Mac - Single Eye Shadows in Palette - Dark Shades

Urban Decay - Naked Palette


Eye Brushes - From Left to Right

Sigma Blending - E25 - Used to Apply Lid Color

Sigma Blending - E35 - Used to Hight Light

Sigma Small Tapered Blending - E45 - Used in Crease


Gel Eye Liner Brushes - From Left to Right

Sigma Flat Definer - E15 - Used for Eye Liner

Mac - 266 - Tapered Eye Liner

Sigma Short Shader - E20 - Used for Smudging Eye Liner

Sigma Small Eye Liner - E10 - Used for Eye Liner


Mac - Khol Eye Liners


Lancome - Eye Lash Primer

Covergirl - Lash Blast Mascara


Smashbox - Brow Tech To Go - Use to fill in Eyebrows


The next few items are for storage and cleaning items

This is how I store / carry my make up when I take it places

I bought this container at Target in the Orginization Secteion


This is a Quick Change Brush Cleaner - This brand is not sold in stores (Sorry)

I use this after each time I use my brushes - I spray it on the brush and rub the brush on a towl to clean

I also do a deep cleaning of my brushes once a week using baby shampoo and water

I clean my brushes so often to prevent bacteria from forming in my brushes that can cause breakouts

I hope you all enjoy seeing the products I use. Again I am not saying to go out and buy them by any means. I have just fallen in love with these products and they have become part of my daily routine

If you have any questions on the color or the prices leave me a Facebook message and I will let you know

I will do a second post on some of my favorite hair care products as well